Import file
Permissions needed: Data management
Table of Contents
This page describes a convenient way to import smaller datasets from data files like CSV or Microsoft Excel. If you want to import larger datasets, import data from other sources (e.g. SQL DB, Google Sheets, Sharepoint, FTP, ...), or schedule automatic imports at given times then check out our ETL jobs instead.
Supported formats: CSV, XLS, XLSX (Microsoft Excel), or ZIP archive containing files with supported formats.
To start the import of a data file:
- On the Queries page: click on the "Import file" button in the top right of the page.
- On the Visualization page: click on the "Import" button in the header.
Import steps:
- Upload file
- Configure import settings and start the import
- Visualize imported elements
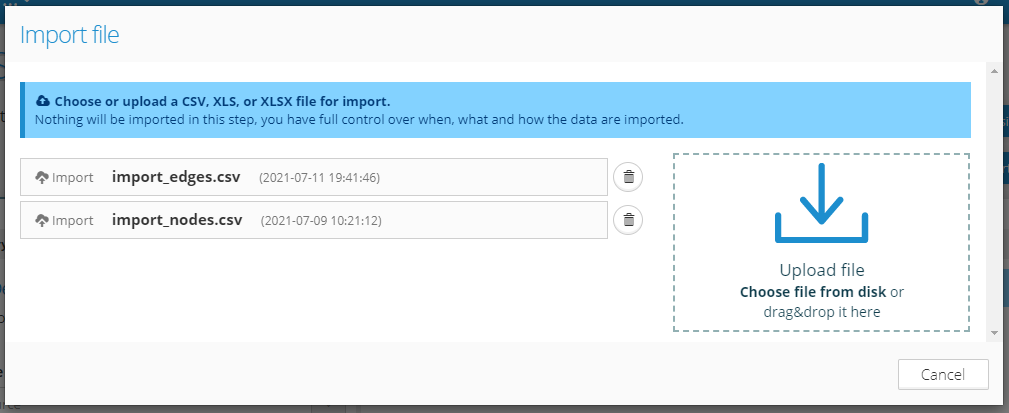
1. Upload file
File upload is the first step of the import. The goal is to have the file for import available in the Graphlytic Server. A window is displayed (see below) where you can see all your uploaded files, can drag & drop new files (or find files with the "Choose file from disk" link), or delete old ones.
To start the import configuration click on one of the uploaded files.
2. Select import settings
This window is slightly different depending on whether you are importing a CSV or an Excel file, and whether you are importing nodes or relationships. The CSV import relationships alternative is shown in the screenshot below.

2.1.Import as Nodes/Relationships
![]() in the picture above.
in the picture above.
Switch between nodes or relationships based on what type of elements you want to create. Every row (record) in the imported file represents one element. The import settings window will change when you switch between nodes and relationships to show only the relevant parts. The main difference is that when you want to import relationships you have to set the rules for matching the start and end nodes of a relationship (these nodes have to already exist in the database prior to creating a relationship between them).
In the picture above only the version for importing relationships is shown because it contains everything node importing does, plus the start and end node matching which is needed only when importing relationships.
2.2.File parser configuration
Here you can select a few important attributes for the file parser, like Encoding (only for CSV), Column separator (only for CSV), Excel sheet (only for XLS, XLSX), and check if the first row is the header. Other settings like quoting and escaping can be set also, see the Advanced settings part of the window - see the part ![]() below.
below.
The first row is the header - check this if your file has a header row. The header will be not imported as a data row but the values will be used as column names and initial graph property names.
2.3.Import ID
Import ID is a string that will be saved on every imported graph element in the property "_importId". This value is used for finding the elements after import and for grouping several imports into one dataset with easier access.
2.4.Map file columns to graph properties
![]() in the picture above.
in the picture above.
In this part of the import configuration, it's possible to create rules for creating node labels (or relationship types) and choose which columns should be imported as element properties in the graph.
Every column from the imported file is represented as a row in the columns table. Here you can set which columns should be imported as graph properties and map them to specific property names. Other options are:
- File column - this name is used to identify a column in this form
- Graph property - the name of the graph property that will be updated when this column is imported
- Data type - choose the data type of the graph property value
- Array - check if you want to import the values as an array (you can set the array item delimiter in Advanced options)
- Sample values - here you can see a sample of the values that will be imported. In the case of a CSV file, if the values do not correspond to what you are expecting, please try to change the Encoding, Column separator, Quoting, and Escaping settings.
2.5.Start node matching
![]() in the picture above. Available only for relationships import.
in the picture above. Available only for relationships import.
Choose the column that will be used for the relationship's start node matching. Node's label matching is optional and node's properties are mandatory. Property matching is done as a pair "column"=>"property".
2.6.End node matching
![]() in the picture above. Available only for relationships import.
in the picture above. Available only for relationships import.
Choose the column that will be used for the relationship's end-node matching. Node's label matching is optional and node's properties are mandatory. Property matching is done as a pair "column"=>"property".
2.7.Merge with existing
![]() in the picture above.
in the picture above.
Choose if you want to create a new element for every record in your file or if you want to update the existing elements if such an element already exists in the graph. In the case of the "update" alternative please select a graph property that has unique values and is mapped in your import (in the column mapping table above). Node labels or relationship types are also compared and have to have the values as the imported element.
2.8.Advanced options
![]() in the picture above.
in the picture above.
Settings in the Advanced options can be used in special cases but most of the time the default settings are sufficient.
Advanced options for any kind of file include:
- Array delimiter - choose which character is used as the array delimiter when importing array values.
- Commit size - number of elements imported in one commit.
- Empty is null - check if you want to import empty values from the file as null values or as an empty string.
Advanced options for CSV files include:
- Values are quoted (") - check if all values in the imported file are quoted with double quotes and if you don't want to import the quotation marks.
- Special chars are escaped (\) - check if special characters in the imported file are escaped with a backslash (the character \ ).
2.9.Import a file into DB
![]() in the picture above.
in the picture above.
After configuring all import settings click the "Import" button to start the import.
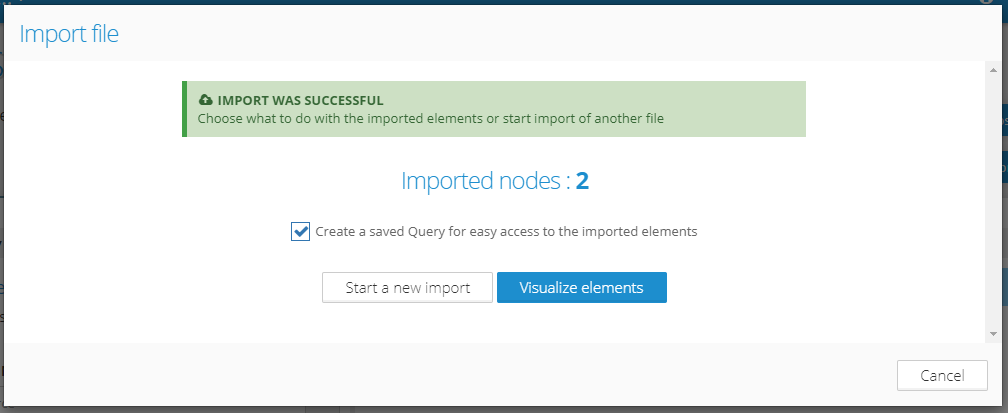
3. Actions after import
After a successful import, several actions are available:
- Create a saved Query for easy access to the imported elements - with this checkbox, a pre-configured query will be available on the Queries and in Visualization search Filters, which can be used to easily access the imported nodes.
- Start a new import - jumps to Step 1 where you can select another file for import. All configurations, including Import ID stay unchanged.
- Visualize elements - starts visualization of all imported elements.