Install in Azure
Table of Contents
There are two main options for how to install Graphlytic in Microsoft Azure.
Graphlytic Azure App - “one-click install” using a pre-defined Azure app. This page is about this option.
Easy to install and upgrade. Not suitable for enterprise environments with specific security needs.
Create a virtual server and install Graphlytic manually - see Installation Manual for instructions for specific operating systems, e.g. RHEL, or Windows Server.
Full configuration options, custom security, etc. Ideal for enterprise environments.
1. Installation using the Azure app
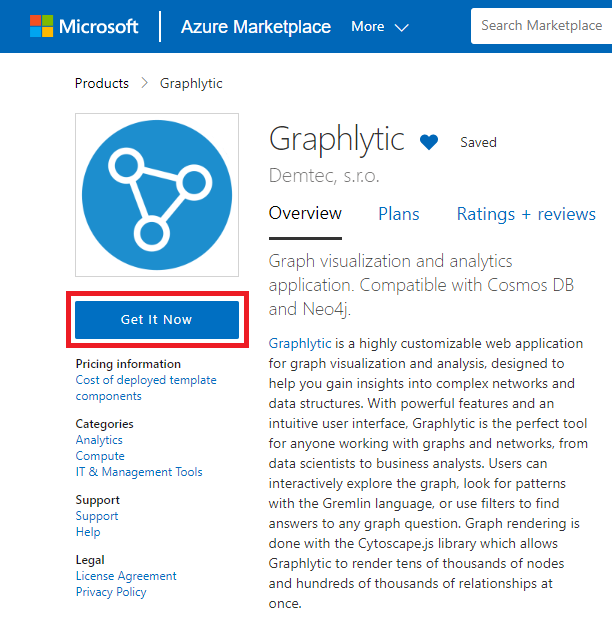
1. Start the installation
Find Graphlytic App in the Azure Marketplace and click “Get It Now”.
2. Configure the installation
Select the Standard Plan, click “Create” and follow the instructions. This will create one virtual server and install the application.
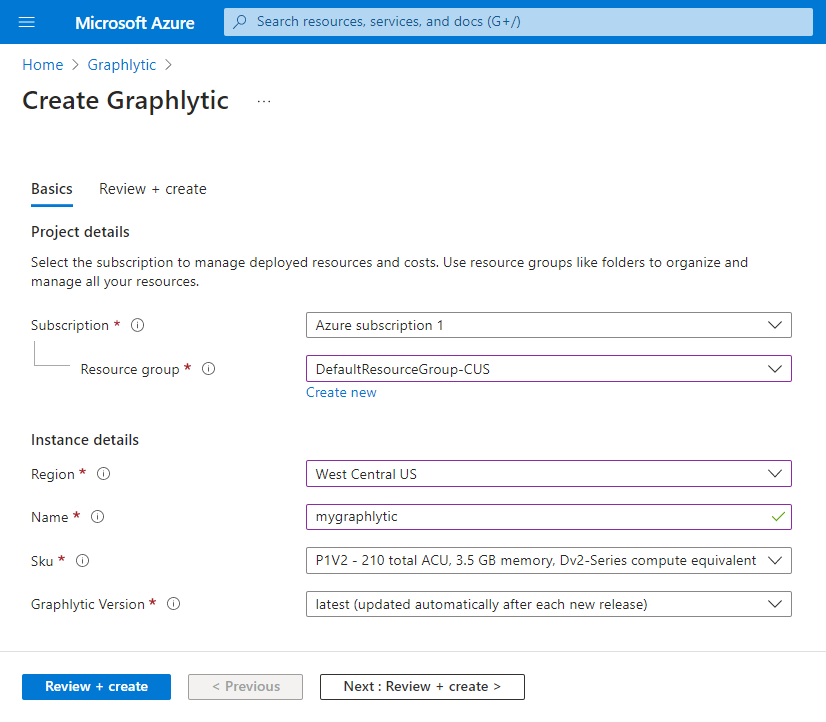
Notable configuration options:
Resource group - creating a new Resource Group is always the safest option. Use an existing Resource Group only when you need the application to be managed with other apps as a group.
Region - select the closest region to you for the best performance.
Name - select a name for your graphlytic application. This name will be used in the default URL for the application.
Sku - hardware setup of the virtual server created for Graphlytic. Start with the smallest, it can be upgraded later.
Graphlytic Version - choose a specific version or choose “latest” for automatic upgrades.
After successful deployment, you can find your Graphlytic App in the chosen Resource Group. The default Graphlytic URL will be “https://<name>.azurewebsites.net/“ (where <name> is the name selected in step 2).
The default username is “admin” and password is “admin”. Please change the password in the profile after sucesfull log in and activation.
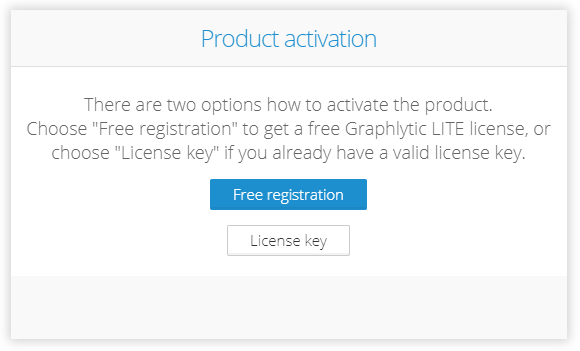
3. Activate Graphlytic
After first login activate the application using one of these options:
Free registration - enter your email to get the automatic activation email for the LITE edition (always free, no card needed). LITE edition is limited to one user and one graph database connection.
License key - enter a valid license key. Contact us at support@graphlytic.com to get a free trial license key for the ENTERPRISE edition.
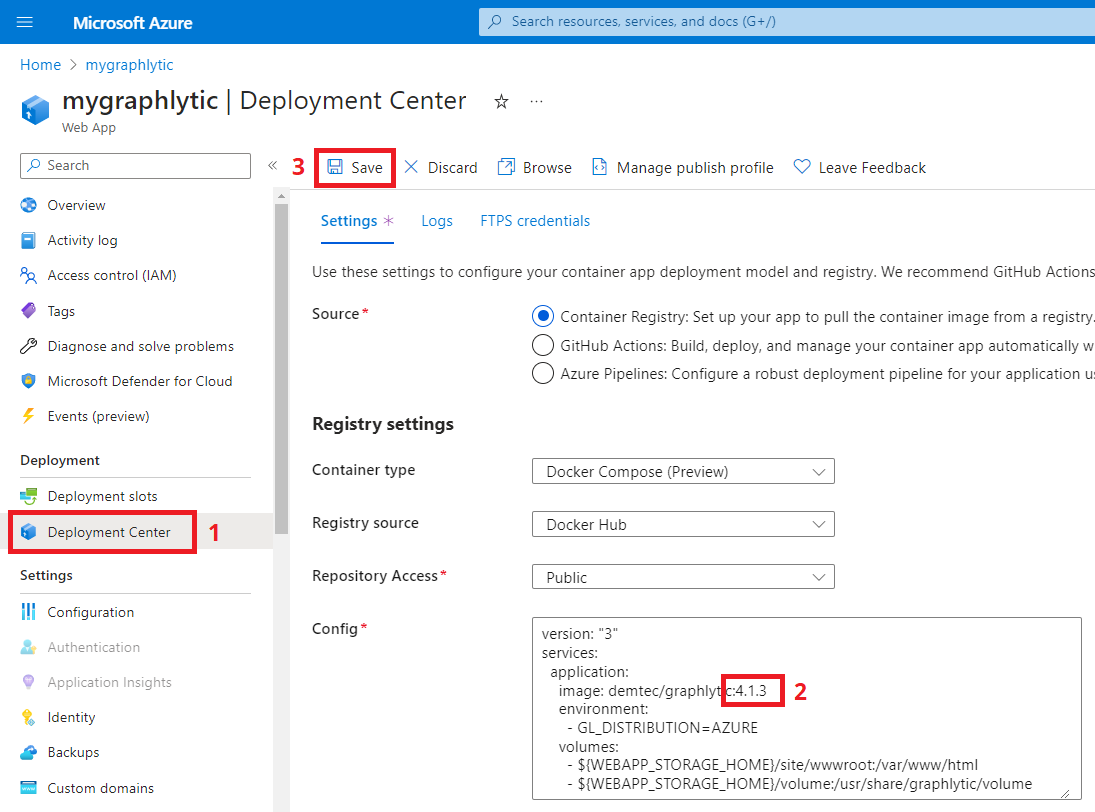
2. Upgrade Graphlytic Azure app
To upgrade Graphlytic installed as an Azure app all you need to do is to change the version in the deployment config and restart the app.
Choosing the version explicitly:
Open the Deployment Center of your app.
Change the version in the config (or use “latest” if you want the automatic upgrade to work).
Save the changes by clicking on the Save button.
Go to the “Overview” page of the app and click on the Restart button to apply the changes (it will take a few minutes to rebuild the Docker container and to start the app).
Using automatic upgrade to the latest version - when the version is set to “latest” all you need to do to upgrade Graphlytic to the latest version is to restart the app:
Go to the “Overview” page of the app and click on the Restart button to apply the changes (it will take a few minutes to rebuild the Docker container and to start the app).

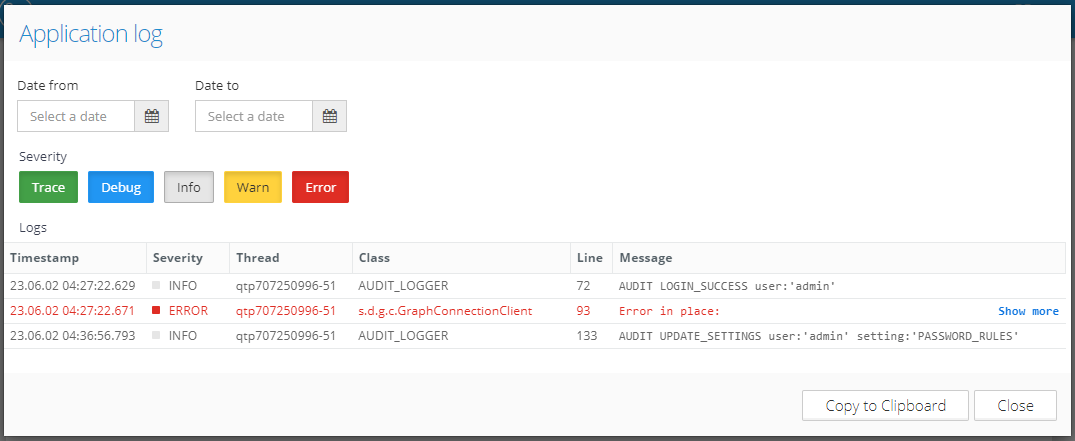
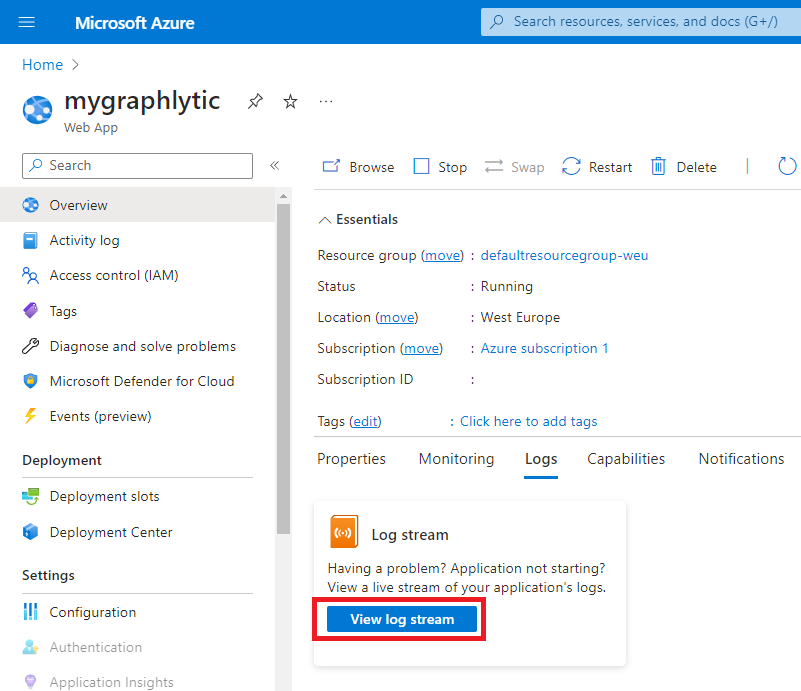
3. Application logs
There are two options to access application logs of the Graphlytic Azure app:
1. Azure logs - Azure is able to stream the logs from Graphlytic into a log stream. Just connect to it and start receiving the logs.
2. Graphlytic log viewer - if the issue is not blocking the application from running a more convenient way to access the logs is to use Graphlytic’s log viewer on the Application Settings page. It allows you to search the logs, highlights log entries based on their severity, and allows you to easily copy logs into the clipboard (if you want to send it to us for inspection at support@graphlytic.com).