Azure - Install Graphlytic with Azure Managed Identity
To use Azure Managed Identities to connect to Azure Cosmos DB, Graphlytic has to be installed using the Single-container mode. The standard Multi-container installation of the Graphlytic Azure App (available in Azure Marketplace) does not support Azure Managed Identities (for more information, see the Preview limitations on this page).
Steps:
1. Create a storage account
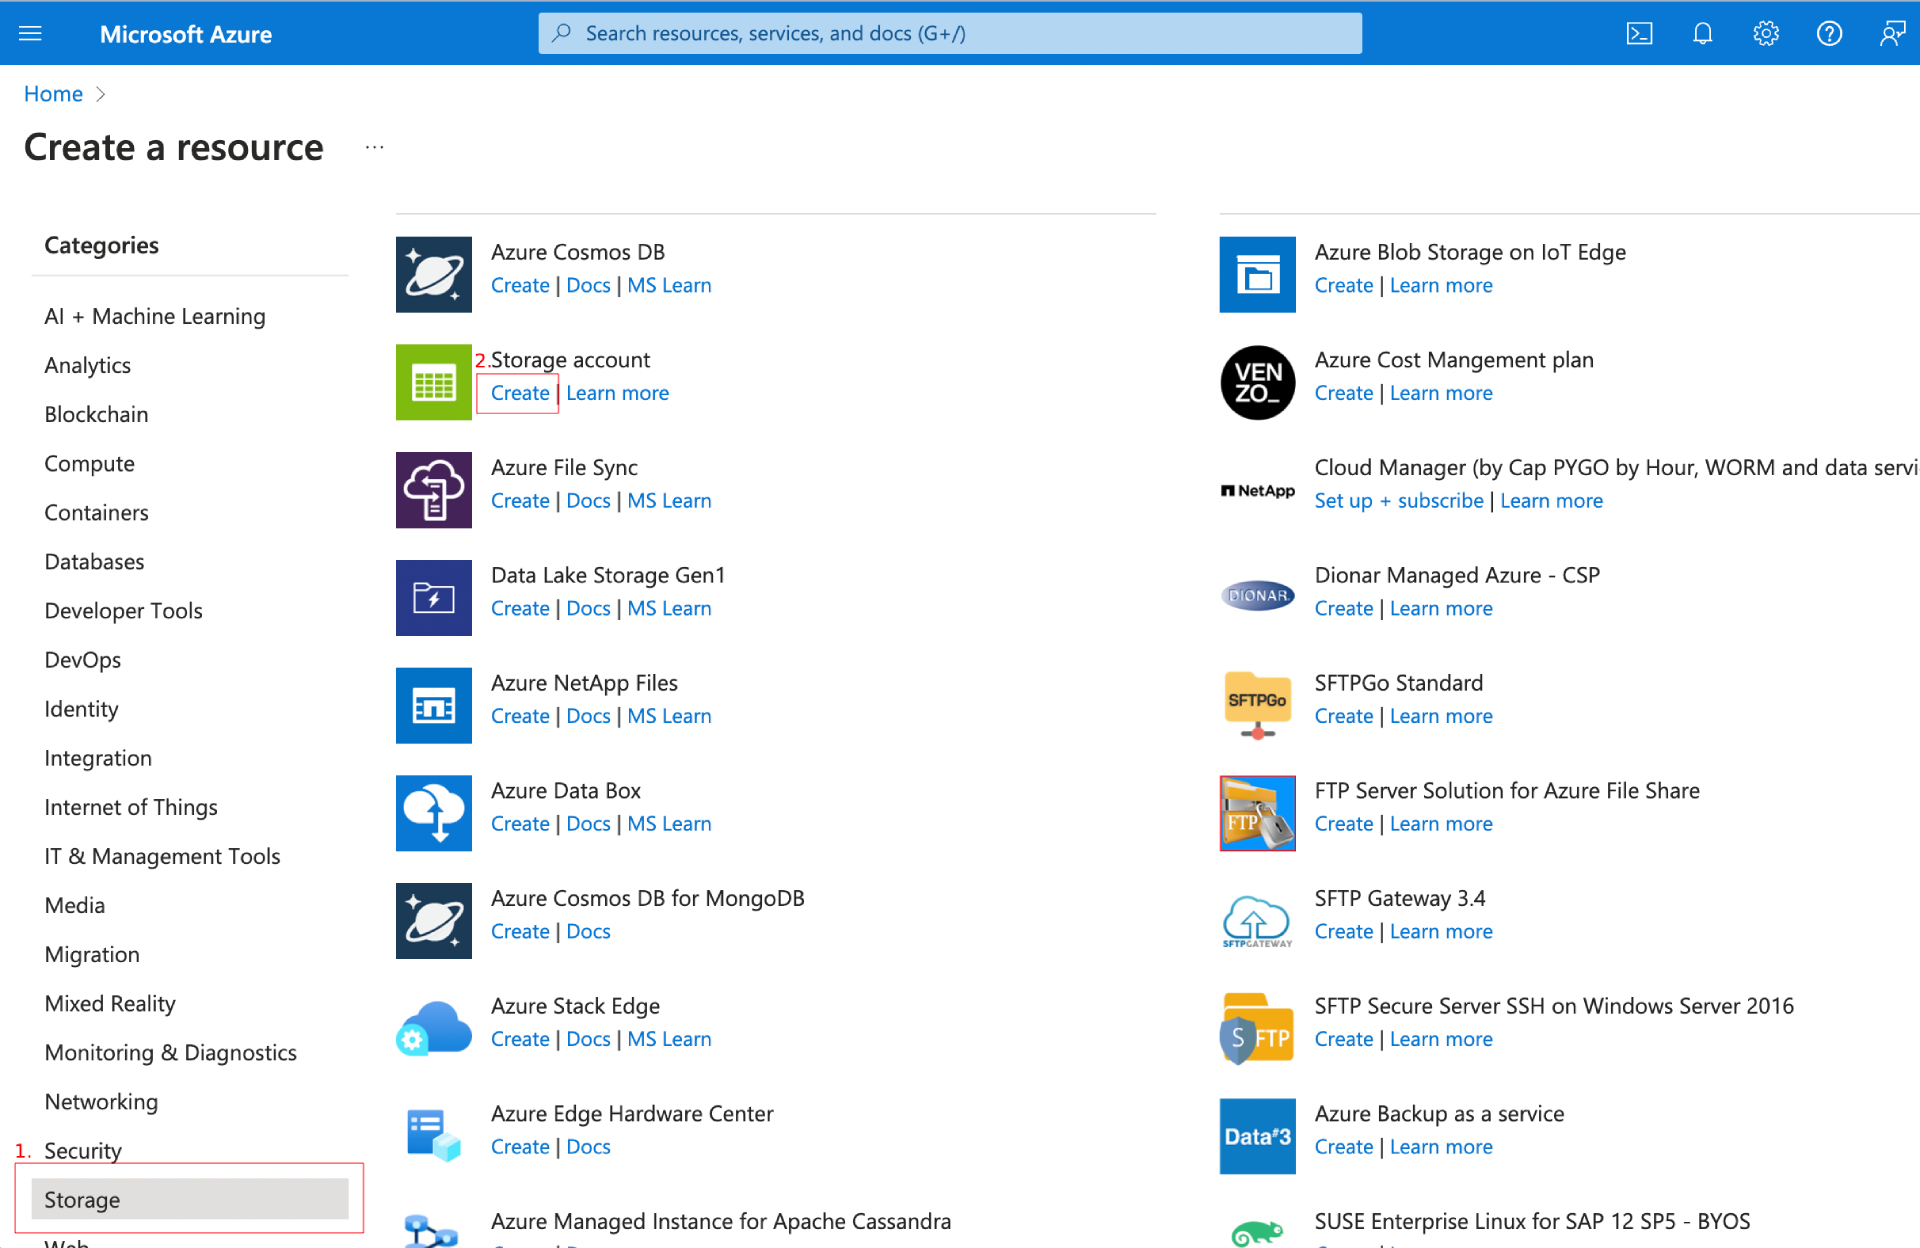
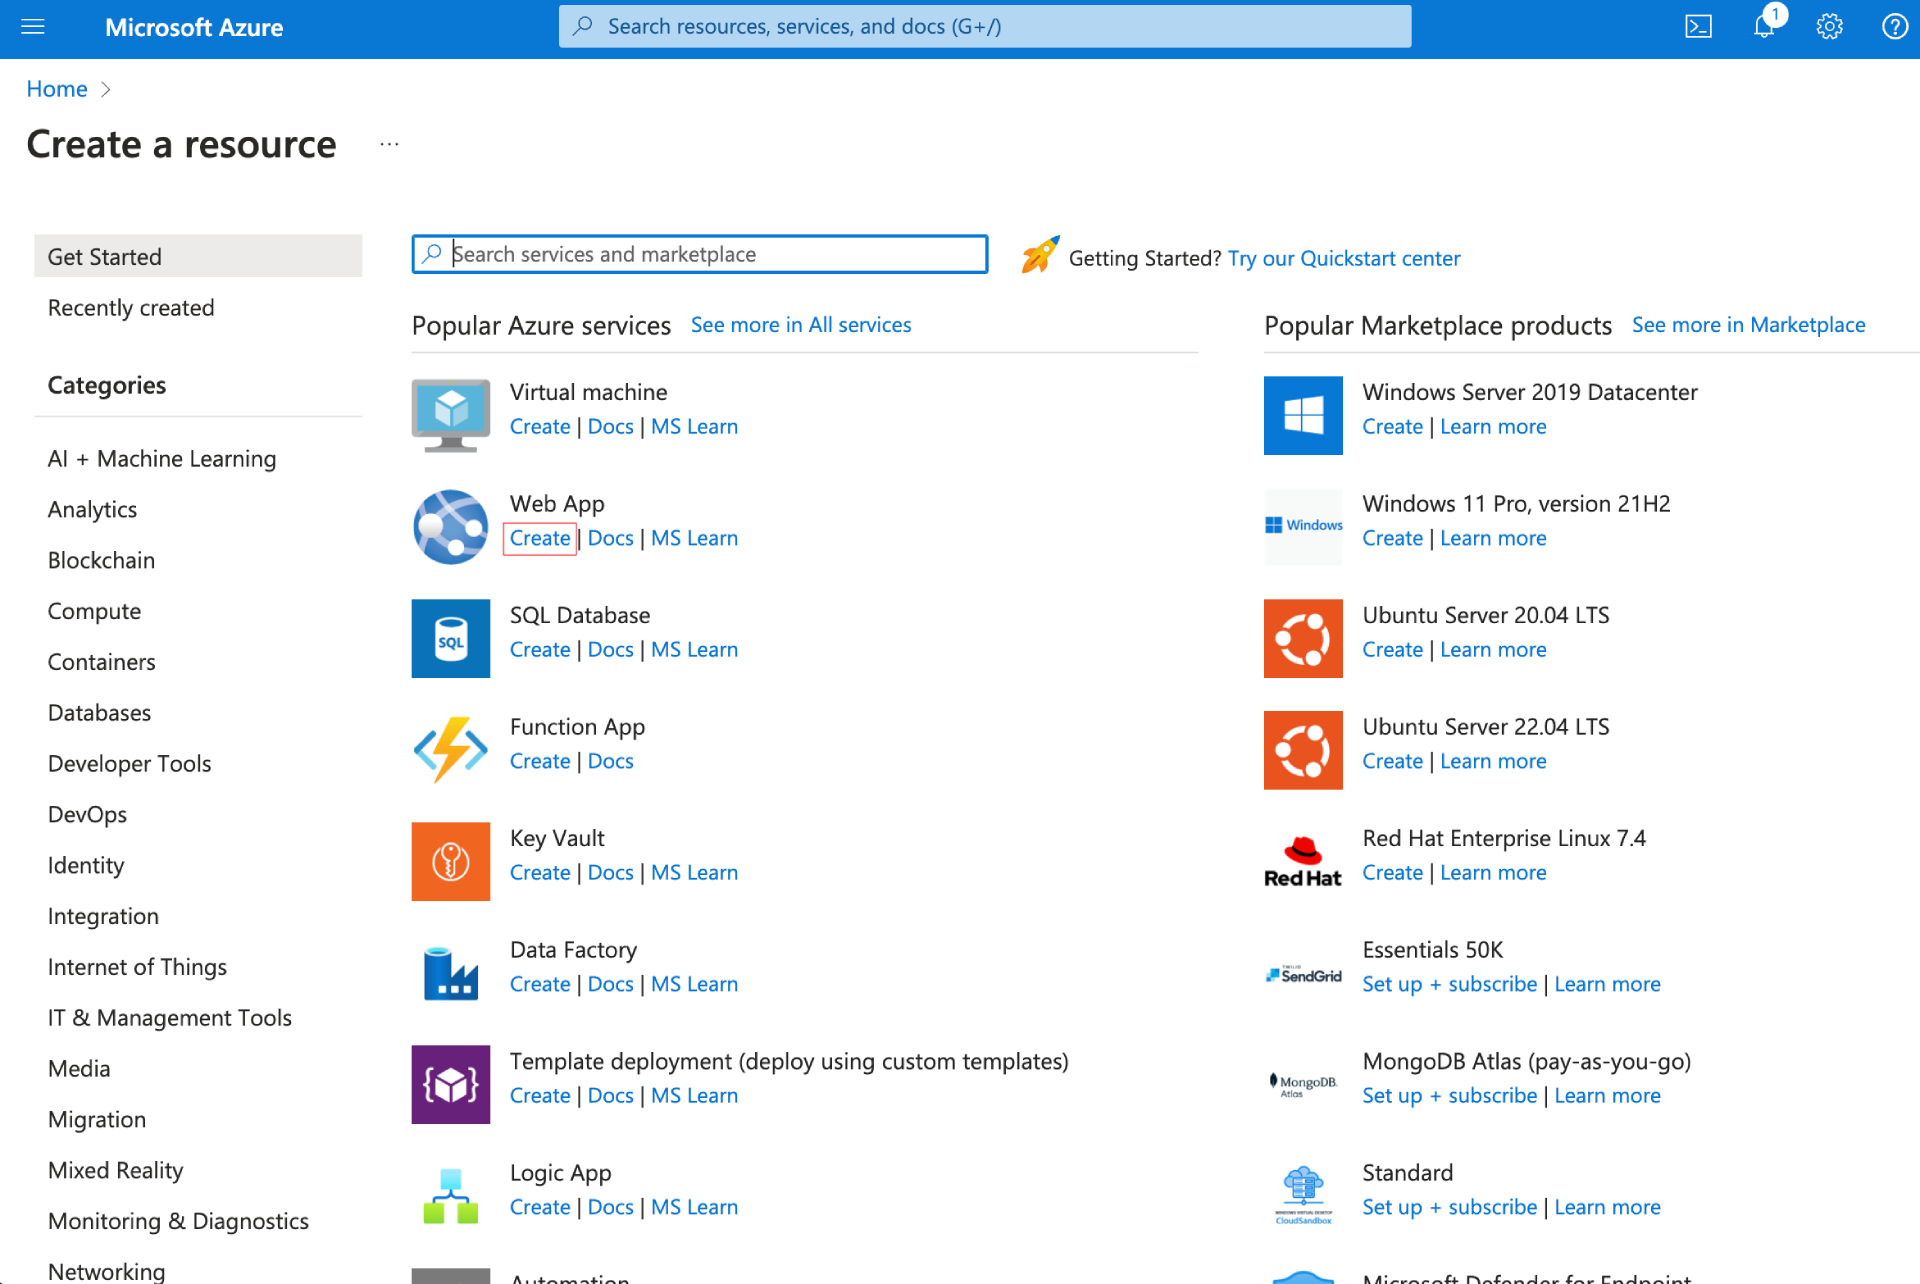
1. Create a resource
On the Azure home, click the “Create a resource” button.

Select “Storage” in Categories, then click “Create” Storage account.
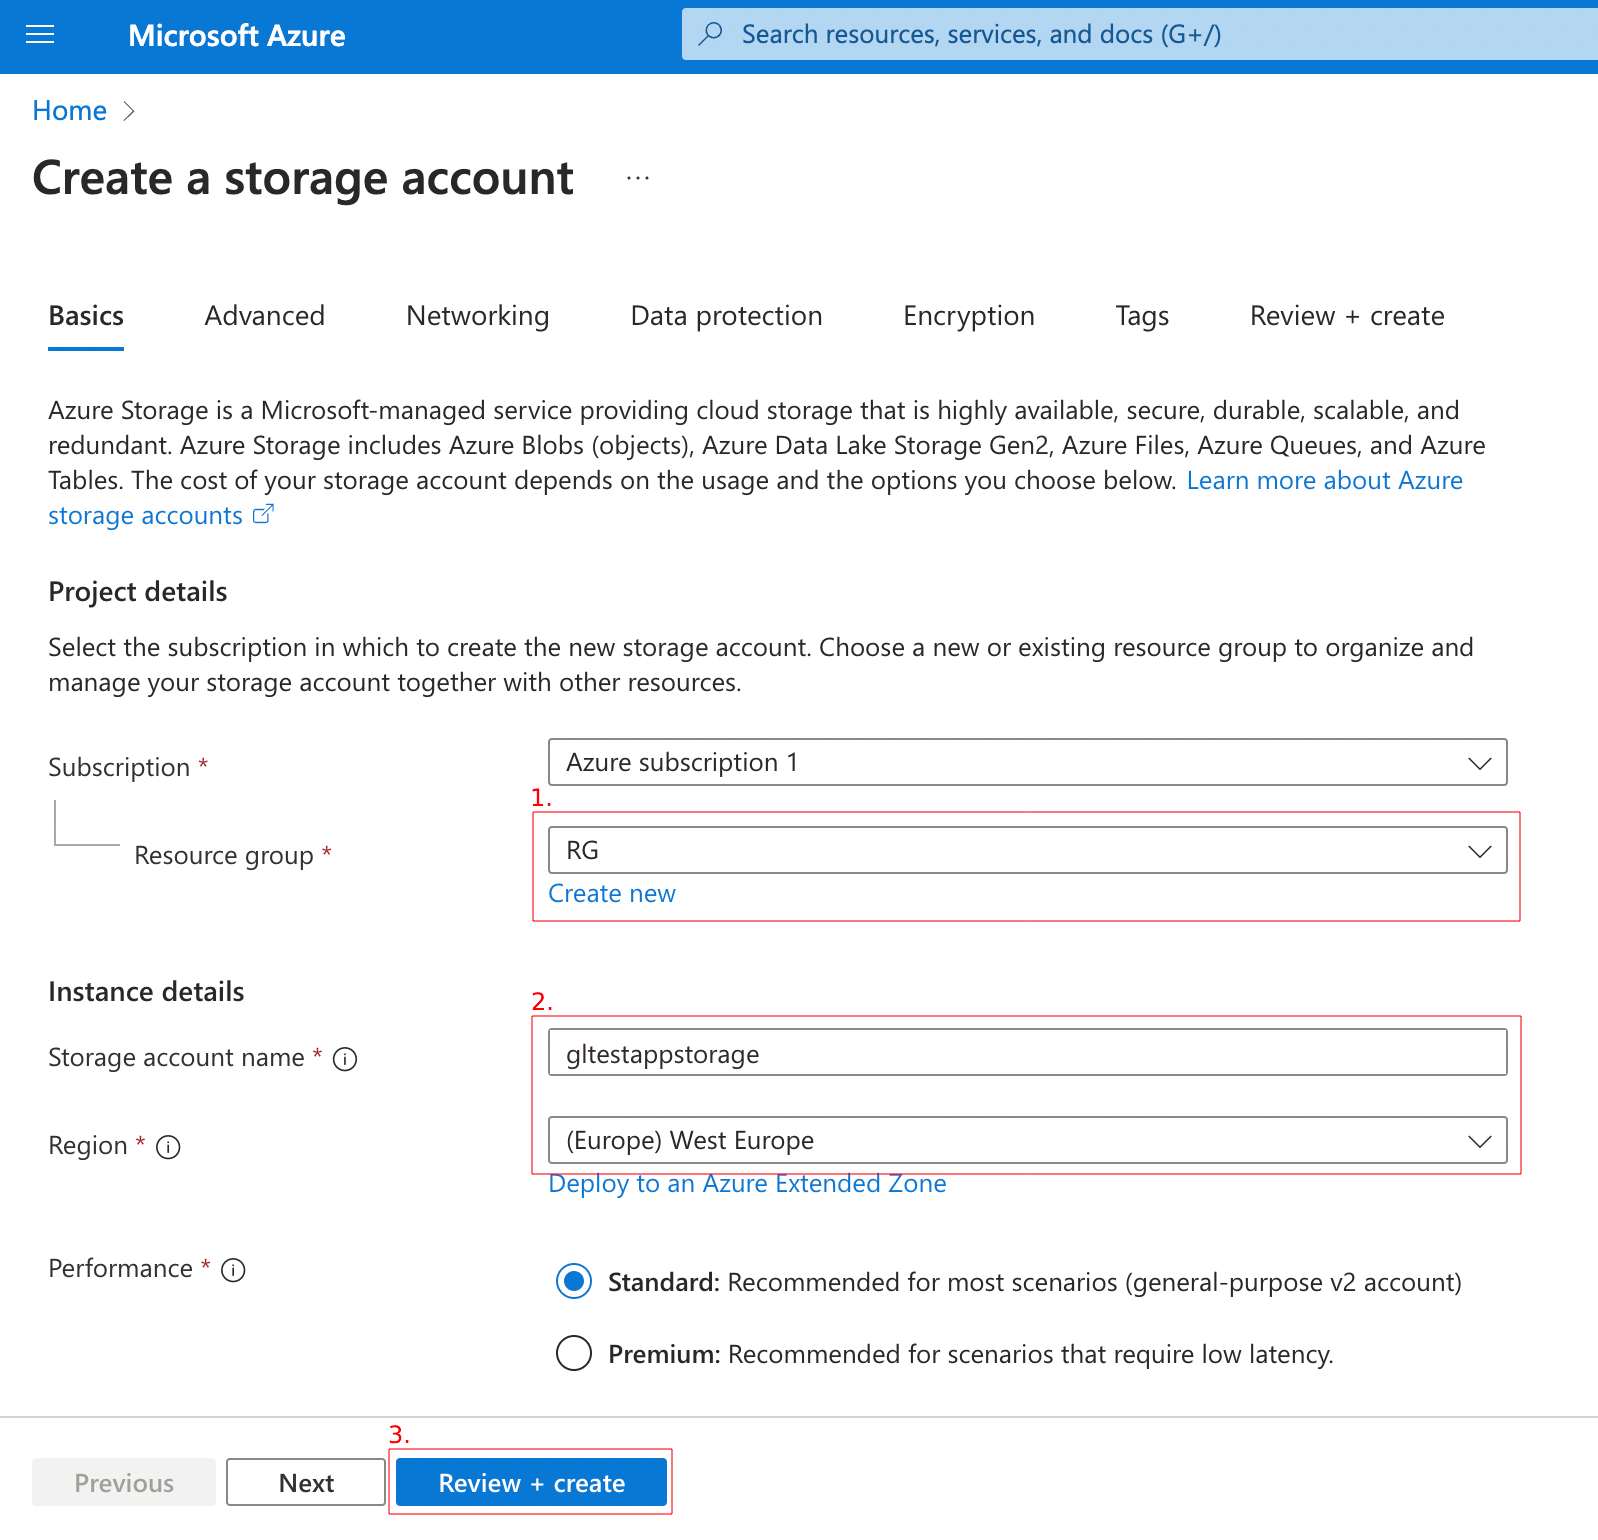
2. Fill out the form for a new storage account
Create or use an existing resource group.
Choose your storage account name and select the region.
Click on the “Review + create” button and finish creating with the “Create” button after validation.
3. Go to resource
After the deployment is finished, click on the button “Go to resource”.
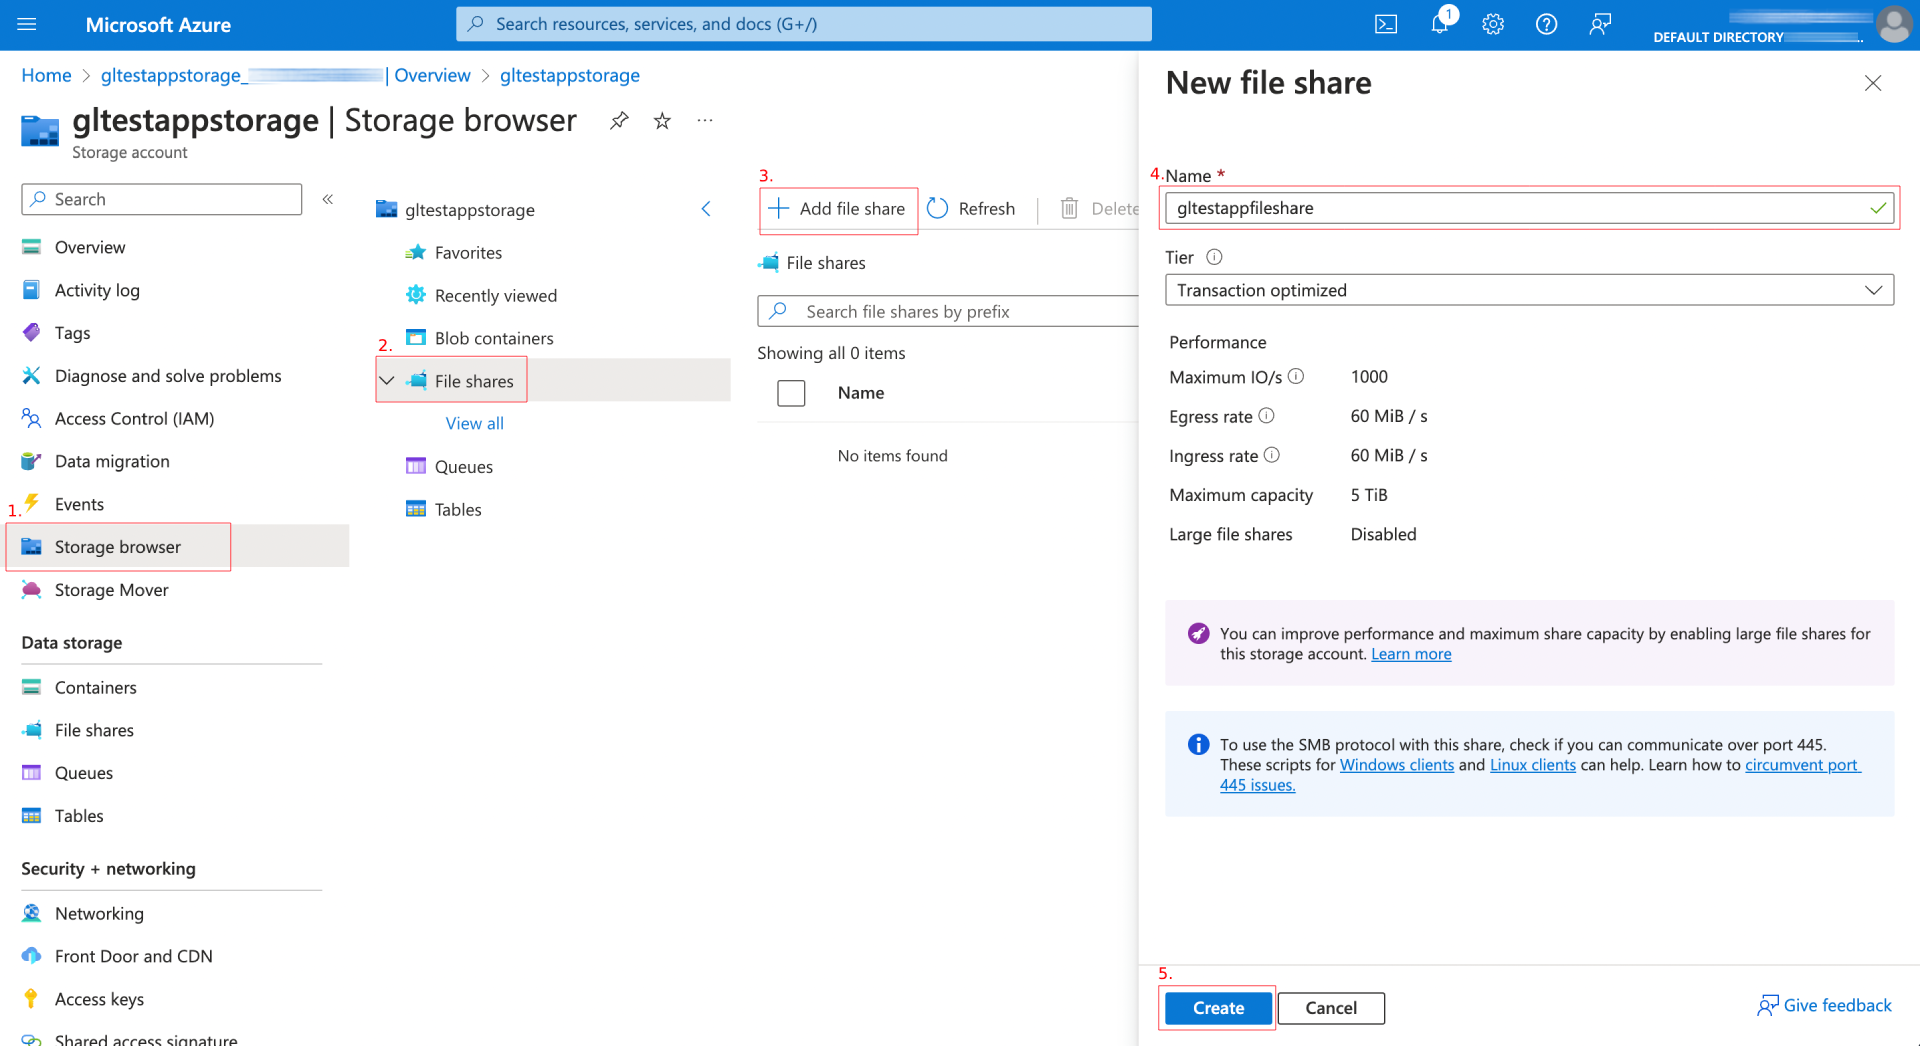
2. Add a file share
On the Storage account page, click on the “Storage browser” item in the left menu.
Click on “File shares”.
Click on “Add file share”.
Fill out the name of the file share.
Complete the process by pressing the “Create” button.
If you don’t see the new File share in the list, try to refresh it with the “Refresh” icon.
3. Create the Graphlytic Web App
1. Create a resource
Click the “Create a resource” button on the Azure home page.
Click on the “Create” link in the Web App section.
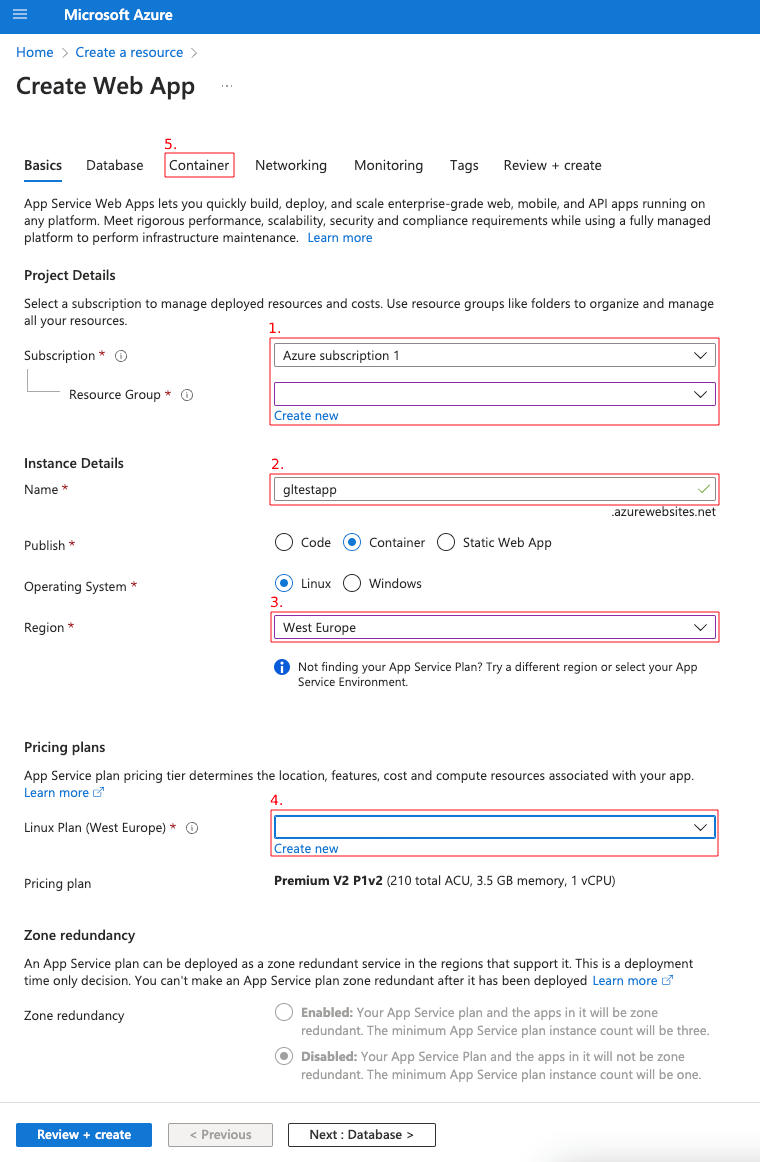
2. Fill out the form in the “Basics“ tab
Create or use an existing resource group from your subscription.
Choose the name of the instance, and select the “Container” radio button.
Select region.
Choose your existing pricing plan or create a new one.
Switch to the “Container” tab.
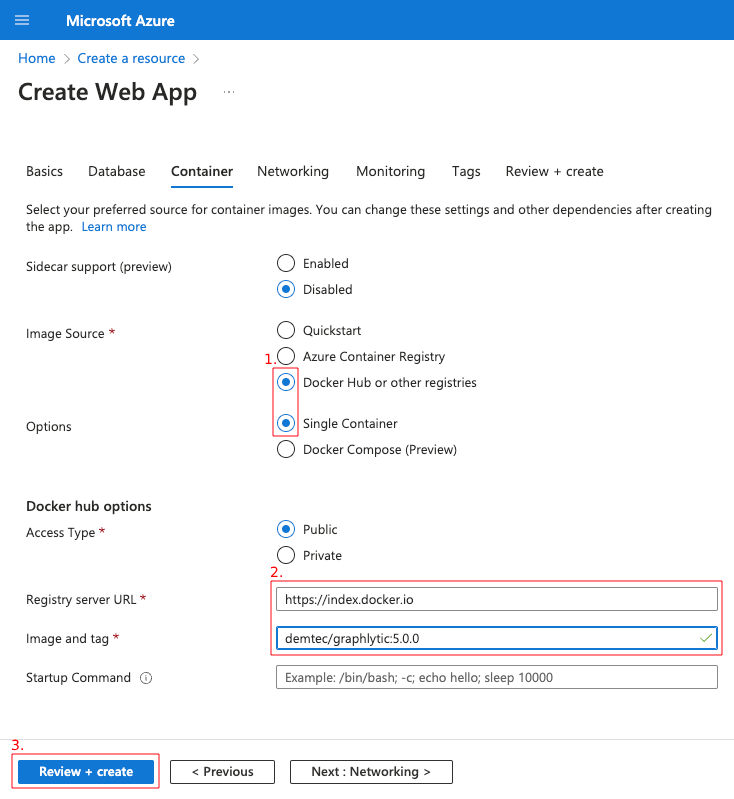
3. Fill out the form in the “Container“ tab
Choose “Docker Hub or other registries” as the image source and the “Single Container” option.
The registry server URL will be set to the Docker Hub URL by default. Then fill in the “Image and tag” value. A list of available options can be found here: https://hub.docker.com/r/demtec/graphlytic/tags.
Click on the “Review + create” button and then finish creating the app by clicking on the “Create” button.
4. Go to the app resource
After the deployment is finished, click on the button “Go to resource”.
4. Create a storage mount for the Web app
Map the storage account to your web application:
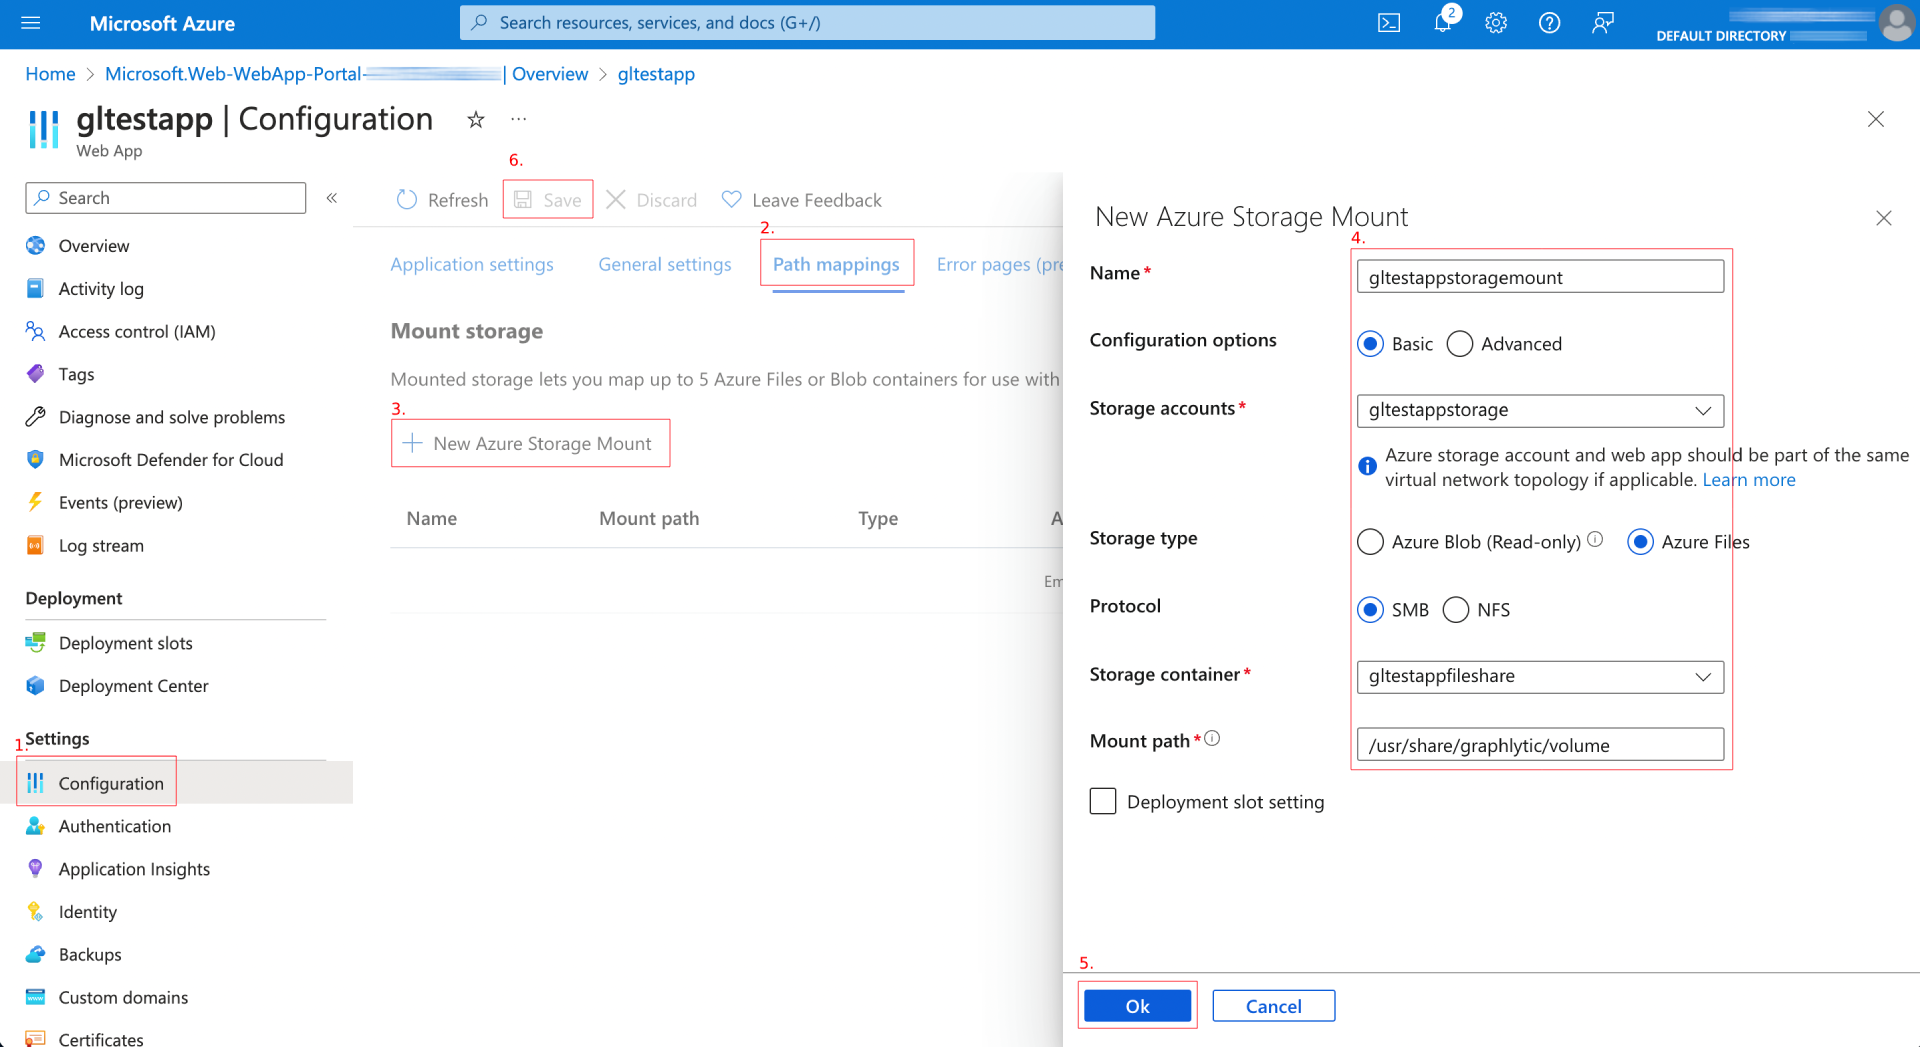
On the Web application page, click the “Configuration” option in the left menu.
Click on the “Path mappings” tab.
Click on the “New Azure Storage Mount” button.
Fill out the form:
Choose the name of the storage mount.
Select the previously created “Storage account” and “Storage container”.
Select the “Azure Filtes” Storage type.
Enter “/usr/share/graphlytic/volume“ as the value of the “Mount path”.
Complete the process with the “OK” button.
Click the “Save” button to save the storage mount settings.
The new mount storage should appear in the list.
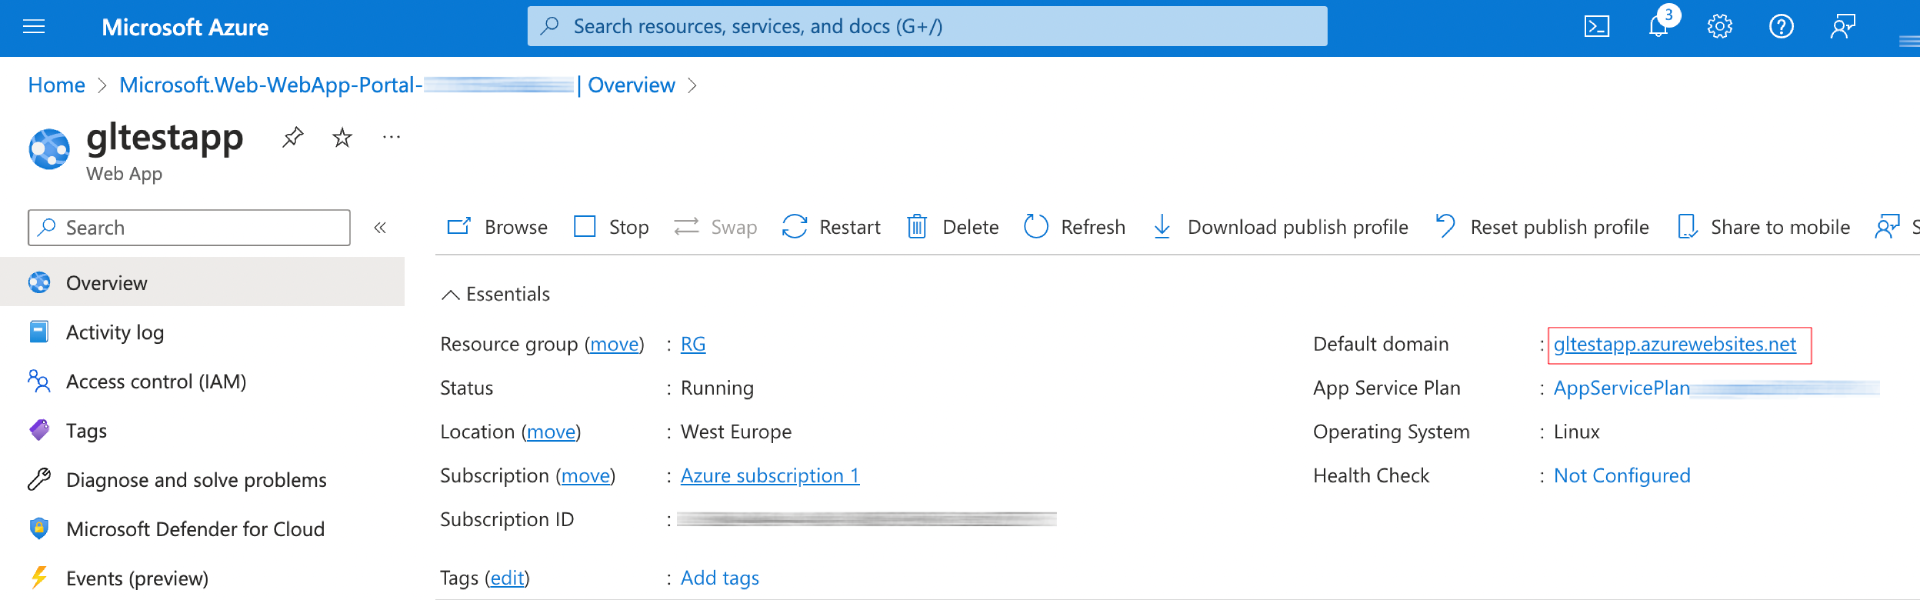
5. Test the application
Test your application using these steps:
On the Web application page, click on the domain of your new web application.
The application will be opened in a new tab.
The default login and password is admin/admin (password can be changed in the user’s profile after logging in).
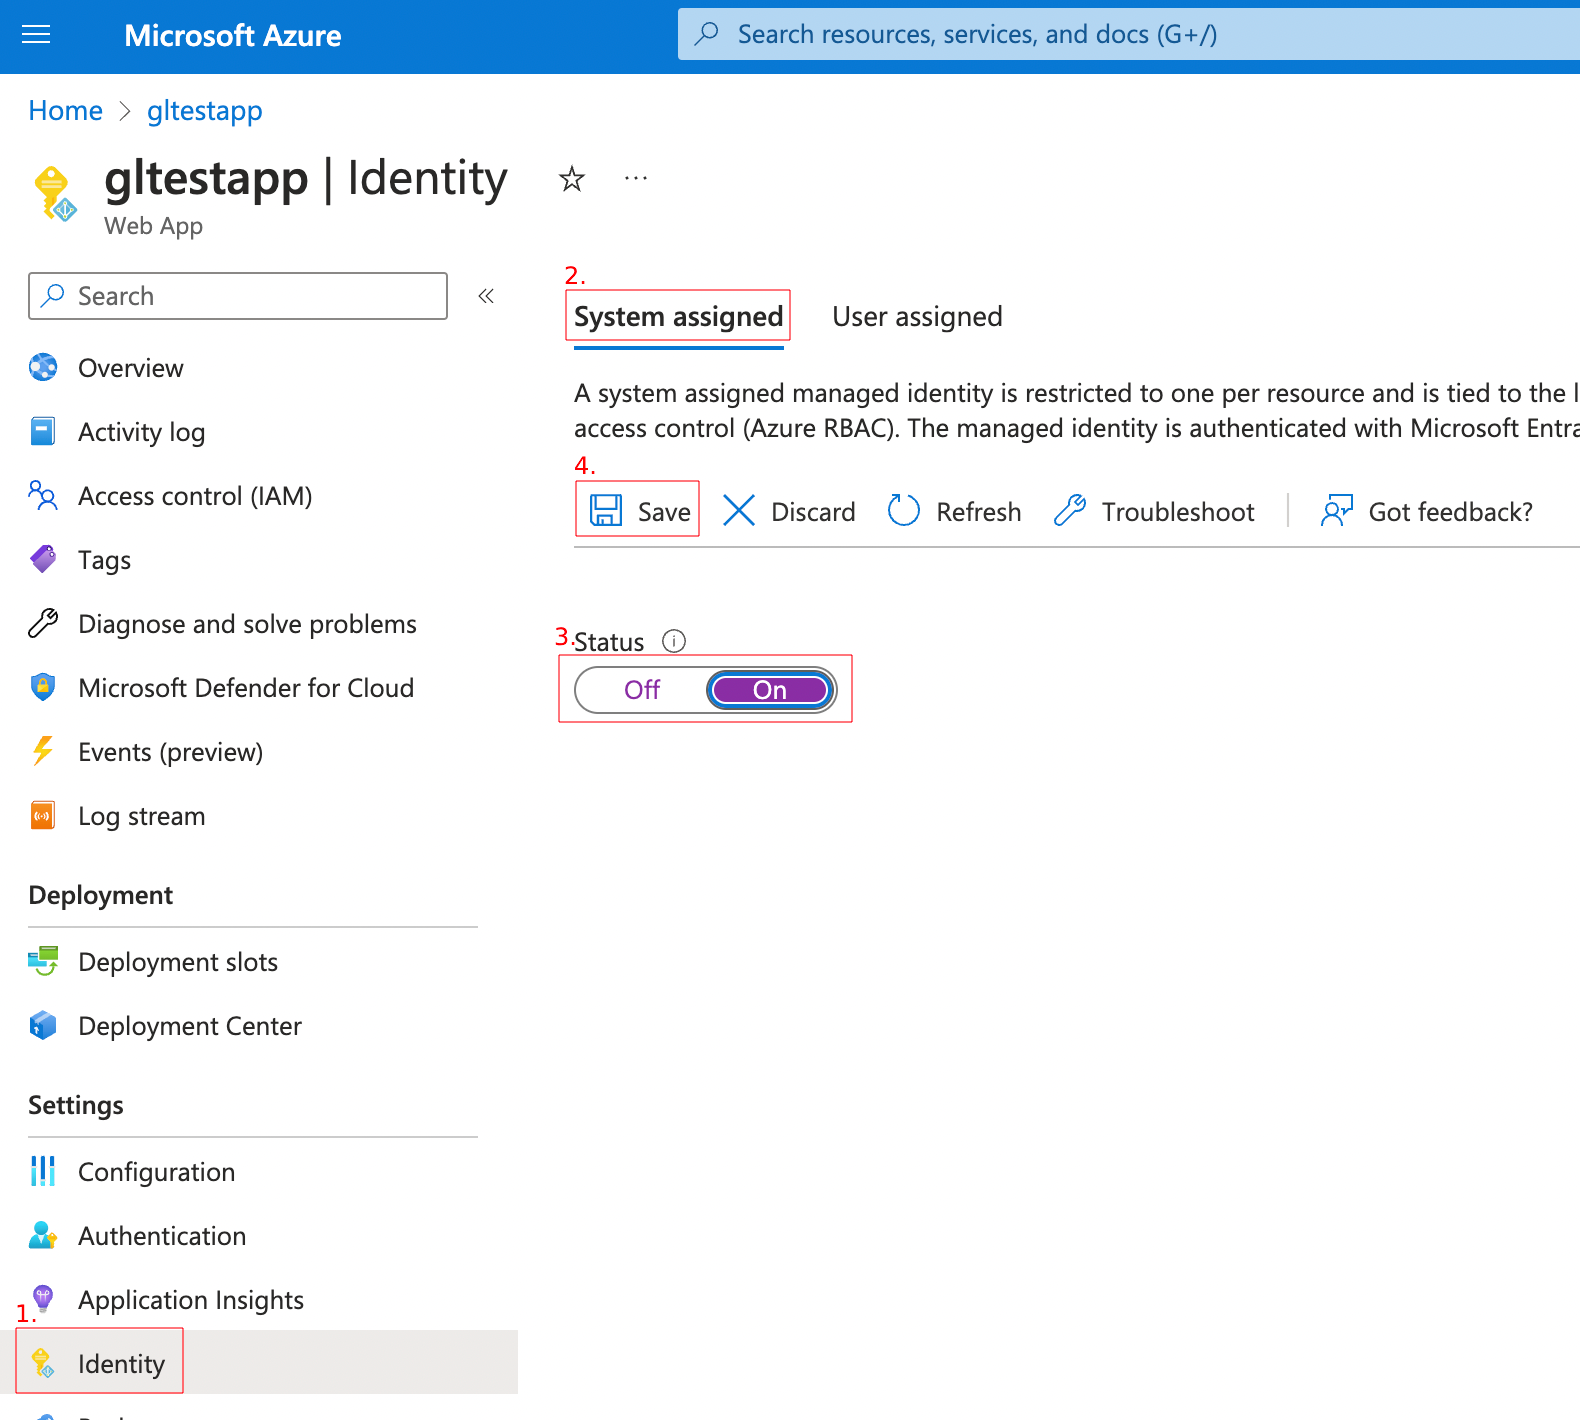
6. Enable the Azure Managed Identity
Click the “Identity” option on the web application page in the left menu.
Stay on the “System assigned” tab.
Switch the “Status” to On.
Save the changes with the “Save” button.
After saving, the “Object ID” will appear in the form.
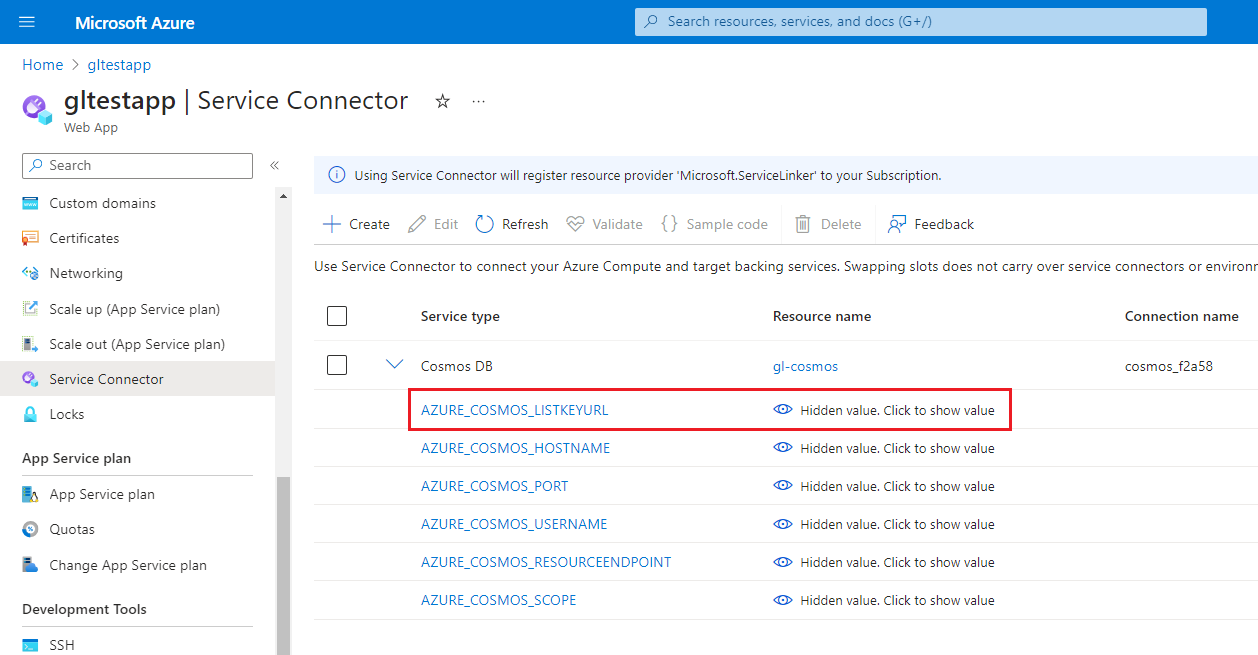
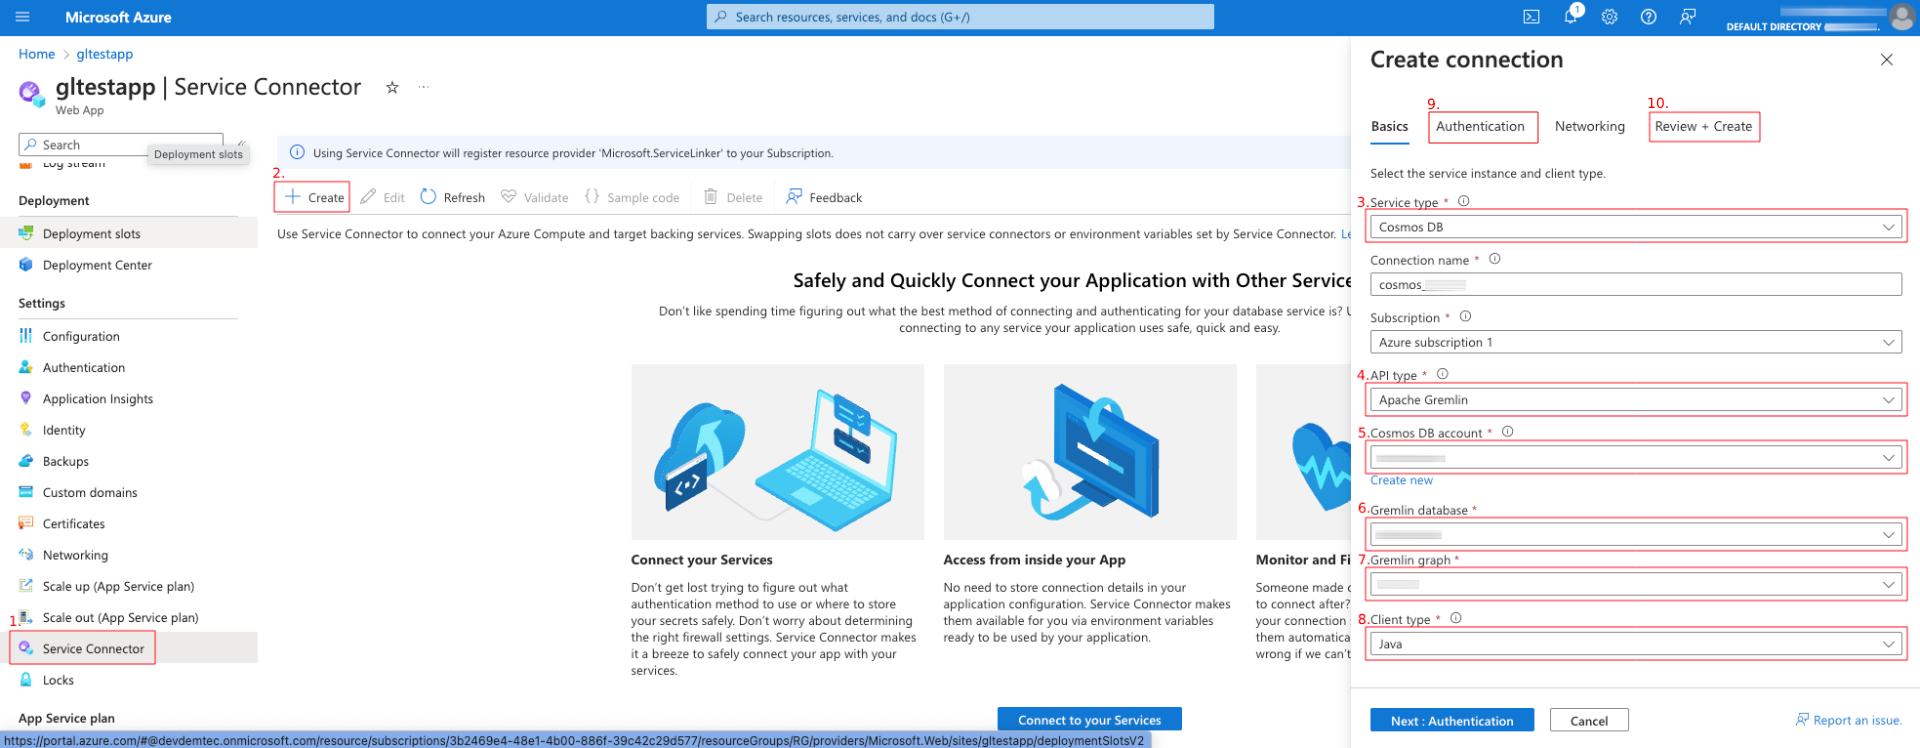
7. Create a Service connector to connect to Azure Cosmos DB
A service connector can be used to connect the web app to an Azure Cosmos DB without the need to enter the Cosmos DB keys into the app.
On the Web application page, click the “Service Connector” option in the left menu.
Click the “Create” button to create a new Service connector.
Choose the “Cosmos DB“ Service type.
Choose the “Apache Gremlin” API type.
Choose your existing Cosmos DB account.
Choose a Cosmos DB database.
Choose a graph in the database.
Choose the “Java” Client type.
Switch to the “Authentication” tab, and check if “System assigned managed identity” is checked.
Switch to the “Review + Create” tab, then click the “Create” button to create the connection.
After these steps, the application will be restarted.
Locate and copy the “AZURE_COSMOS_LISTKEYURL” value in the Service connector value. Use this value in the Graph Connections panel in Graphlytic to create the Azure Cosmos DB connection.