Widgets Management
Table of Contents
Widgets can extend graphlytic functionality. You can create and deploy your own widgets. A widget is a group of javascript, CSS, and HTML files (one from each and only the javascript file is mandatory).
Be careful with the content of these custom files because the deployment can cause security vulnerability of Graphlytic application. Be sure to know what custom widget is being deployed and that you trust the source of the code.
1. Custom widget deployment
Prepare your widget package.
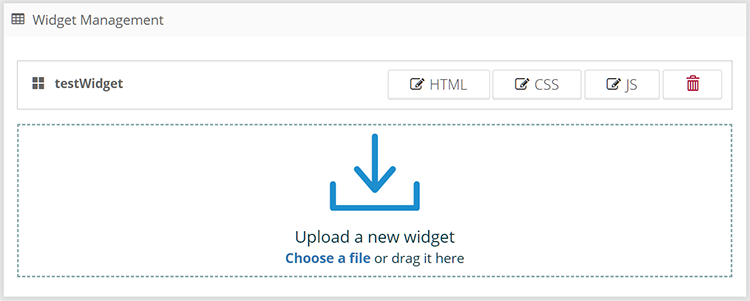
Choose a widget ID (e.g. testWidget) and create a folder with this name.
In the folder create your source files. Supported file types for the presentation layer are CSS (.css) and HTML (.html). The programming language for the widget logic is JavaScript (.js).
Name your source files using your widget ID, e.g. "testWidget.css", "testWidget.html" and "testWidget.js". You can have only 1 file of each type (CSS, HTML, JavaScript) but you don't need to have all types, so your widget can be only the JS file when you don't need custom HTML and CSS functionality.
Add all your files into a zip-compressed package.
Upload your widget package by just dropping it in the drag&drop area.
Enable and configure your widget using Project Widgets Management.
Location of the widgets instalation directory is configurable in the <GRAPHLYTIC_HOME>/conf/graphlytic.conf file. See Configuration for more information.
2. Updating widget source files
The widget source files can be updated using a built-in code editor after clicking on the HTML, CSS, or JS button.
3. Adding widgets to Projects
Uploaded widgets needs to be added into projects where you want to use them. To add a widget to a project please refer to Widgets .